Default case with OSM
This tutorial presents how to create Local Climate Zones with OpenStreetMap data.
Two tools are available to run GeoClimate algorithms: Command Line Interface (beginner user) and Groovy (intermediate and advanced user)
Command Line Interface
Get Geoclimate.jar on your computer
You will run the archive Geoclimate.jar in a Command Line Interface.
First, make sure Java (version 11 minimum) is installed in your computer.
You need to download Geoclimate.jar here.
Rename the downloaded file as “Geoclimate.jar”.
Create a folder in your documents (for instance C:\mydirectory\Geoclimate) and place Geoclimate.jar in this folder.
Create and understand the configuration file
In order to run Geoclimate, you need to write a configuration file. This file specifies inputs, methods and outputs of Geoclimate.
An example of configuration file is presented below :
{
    "description": "Processing OSM data",
    "input": {
        "locations": [
            "Pont-de-Veyle"
        ]
    },
    "output": {
        "folder": "C:\\temp"
    },
    "parameters": {
        "rsu_indicators": {
            "indicatorUse": [
                "LCZ",
                "TEB",
                "UTRF"
            ],
            "svfSimplified": true,
            "estimateHeight": true
        },
        "grid_indicators": {
            "x_size": 100,
        "y_size": 100,
        "rowCol": false,
        "output" : "geojson",
        "indicators" :["BUILDING_FRACTION", "BUILDING_HEIGHT",
                               "BUILDING_TYPE_FRACTION", "WATER_FRACTION", "VEGETATION_FRACTION",
                               "ROAD_FRACTION", "IMPERVIOUS_FRACTION", "FREE_EXTERNAL_FACADE_DENSITY",
                               "BUILDING_HEIGHT_WEIGHTED", "BUILDING_SURFACE_DENSITY",
                               "SEA_LAND_FRACTION", "ASPECT_RATIO", "SVF",
                               "HEIGHT_OF_ROUGHNESS_ELEMENTS", "TERRAIN_ROUGHNESS_CLASS",
                               "UTRF_AREA_FRACTION", "UTRF_FLOOR_AREA_FRACTION",
                               "LCZ_PRIMARY", "BUILDING_HEIGHT_DISTRIBUTION", "STREET_WIDTH"]
         }
    }
}
You can copy this example in a notebook and name it “my_first_config_file_osm.json”. Place this configuration file in the same folder than Geoclimate.jar .
Understand the configuration file
The configuration file is structured in four main parts.
“description” is a text that describes your process. You can name your process here.
“input” specifies the input data you will use. In this example, we specify “osm” for OpenStreetMap, and we run Geoclimate for a small village in France called Pont-de-Veyle.
“output” specifies the format you expect for your output (here “folder”) and where you want to create your output files (here in C:temp).
“parameters” specifies the output you want to calculate based on your reference spatial units (“rsu_indicators”) or on a grid (“grid_indicators”).
At RSU scale, we calculate the LCZ, the TEB inputs and the UTRF (“indicatorUse”: [“LCZ”, “TEB”, “UTRF”]). We use the simplified method to calculate the sky view factor (“svfSimplified”: true) and the method to estimate the height of buildings in OSM (“estimateHeight” : true).
With the grid approach, we specify the grid dimensions in meters (“x_size” and “y_size”) and the output format (“output” : “geojson”). Then, we specify the indicators we want to calculate for each cell of the grid (“BUILDING_FRACTION”, “BUILDING_HEIGHT”, “WATER_FRACTION”, “VEGETATION_FRACTION”, “ROAD_FRACTION”, “IMPERVIOUS_FRACTION”, “LCZ_FRACTION”).
Run Geoclimate
On your machine, open a command prompt.
Go to the folder where Geoclimate.jar is located using this command line :
cd mydirectory\Geoclimate
Then, you can run this command line which presents you the main options of Geoclimate :
java -jar Geoclimate.jar -h
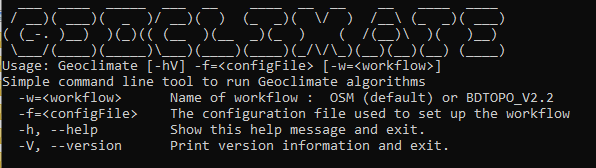
Geoclimate CLI
In order to perform your first calculations with the configuration file above, use
java -jar Geoclimate.jar -f my_first_config_file_osm.json -w OSM
where the f option is used to set the path of the configuration file.
If everything runs well, you will obtain a message :
The OSM workflow has been successfully executed
The results of your calculations are located in you C:\temp folder.
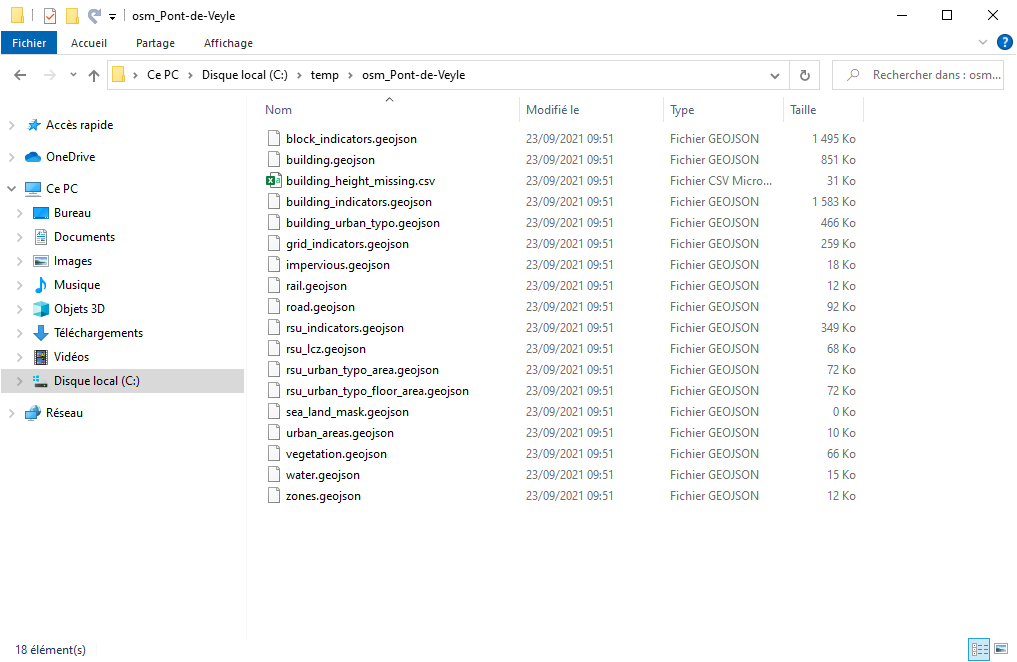
OSM results
GeoClimate - documentation 2020 - 2025 -  This work is licensed under a Creative Commons Attribution-ShareAlike 4.0 International License.